


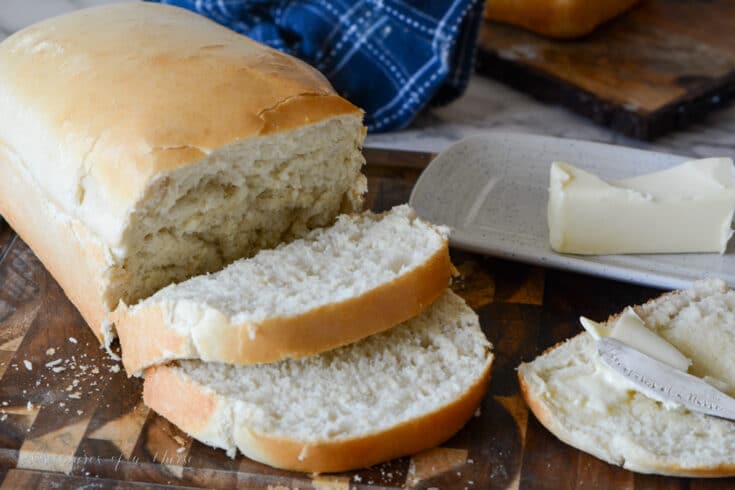
Step into my kitchen and join me in the timeless tradition of baking with our beloved Amish White Bread recipe. With its soft texture, delicate crumb, and irresistible aroma, this bread embodies the heartwarming essence of homemade goodness. As I guide you through the simple steps of mixing, kneading, and baking, you’ll experience the joy of creating something truly special from scratch.

Whether you’re a seasoned baker or a novice in the kitchen, this Amish White Bread recipe promises to fill your home with warmth and comfort, one slice at a time. Let’s roll up our sleeves, dust off our aprons, and embark on a delightful journey of breadmaking together.
What you’ll love about this recipe:
- Simple Ingredients: The recipe calls for basic pantry staples, making it easy to whip up with ingredients you likely already have on hand.
- Versatile: Amish bread is incredibly versatile and can be enjoyed as a standalone snack, as sandwich bread, or even toasted with your favorite toppings.
- Forgiving Recipe: Whether you’re an experienced baker or new to baking, the forgiving nature of this recipe means that even minor mistakes won’t ruin the final result.
- Delicious Flavor: With its soft texture and subtly sweet flavor, Amish bread is a crowd-pleaser that appeals to both kids and adults alike.
- Homemade Goodness: There’s something incredibly satisfying about baking your own bread from scratch, and this recipe allows you to enjoy the comforting taste of homemade bread whenever you like.
- Warm Aroma: Few things rival the comforting aroma of freshly baked bread wafting through your kitchen, and the Amish Bread Recipe delivers just that.
- Family Favorite: Once you’ve tried this recipe, it’s sure to become a staple in your household, loved by all who taste it.
- Generous Yield: This recipe typically yields multiple loaves, making it perfect for sharing with friends and family or freezing for later use.
- Timeless Tradition: Amish bread recipes have been passed down through generations, carrying with them a sense of tradition and nostalgia that adds an extra layer of warmth to every bite.
- Easy to Customize: While delicious on its own, you can also customize this bread recipe by adding nuts, seeds, dried fruit, or spices to suit your taste preferences.
I adore this Amish bread recipe! Discovered it on the Mom Blog Society and have baked it numerous times since. It’s incredibly forgiving, making it a breeze to whip up time and time again.
Another one of my favorite bread recipes is bread machine banana bread.
Ingredients for Amish White Bread
- 7 cups of all-purpose flour
- 1/3 cup of olive oil
- 2 cups of water
- 1/2 cup of sugar
- 1 tablespoon of salt
- 2 tablespoons of yeast
- 1 cup of hot water (about 110 degrees Fahrenheit)
- 1/2 teaspoon of sugar
Amish White Bread Recipe
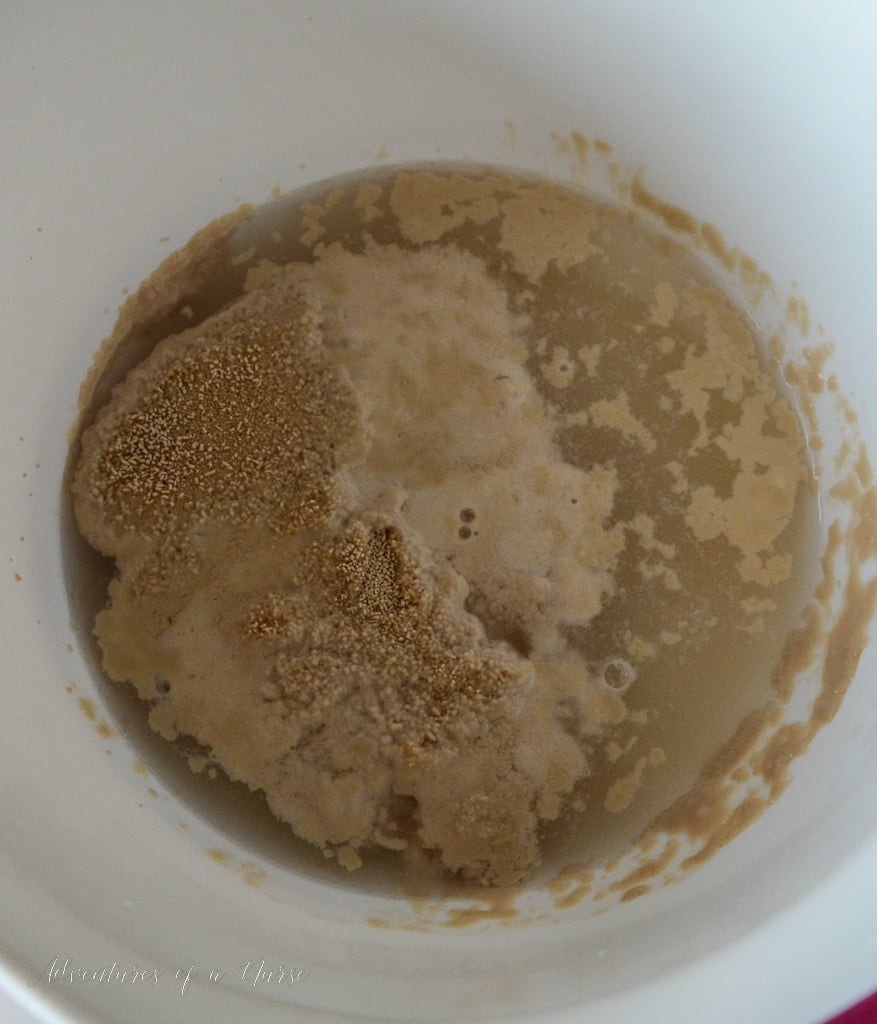
- In a small bowl, combine 1 cup of hot water, yeast, and 1/2 teaspoon of sugar. Set aside until the mixture becomes foamy.
- In a large bowl, mix together flour, remaining sugar, olive oil, water, and salt.
- Pour half of the flour mixture into a mixer bowl, using a stand mixer with a dough hook attachment.
- Add the foamy yeast mixture to the mixer bowl and begin mixing. Gradually add the remaining flour mixture while continuing to mix, until a large ball of dough forms. Mix for about 4-5 minutes.


- Place the dough in a large greased bowl and cover it with plastic wrap and a kitchen towel.
- Allow the dough to rise for about 1 hour or until it has doubled in size.
- Once the dough has risen, punch it down and divide it into two equal portions.
- Shape each portion of dough into a loaf, following the shape shown in the photo above.
- Place the shaped dough into buttered bread pans.
- Cover the pans with a kitchen towel and let the dough rise again for about 30 minutes.


- Preheat the oven to 350°F (175°C).
- Bake the loaves in the preheated oven for about 30 minutes or until the top is golden brown.

Tips & Tricks
- Use Fresh Ingredients: For the best results, use fresh ingredients, especially yeast and flour. Fresh ingredients will yield better texture and flavor in your bread.
- Properly Measure Ingredients: Accurate measurement of ingredients is crucial in baking. Use measuring cups and spoons specifically designed for dry or wet ingredients, and level off ingredients with a straight edge for precise measurements.
- Activate Yeast Properly: When using active dry yeast, proof it in warm water (around 110°F or 43°C) with a pinch of sugar before adding it to the rest of the ingredients. This ensures that the yeast is alive and active, leading to a better rise in the dough.
- Knead the Dough Thoroughly: Kneading develops the gluten in the dough, giving the bread structure and texture. Knead the dough until it becomes smooth and elastic, usually about 8-10 minutes by hand or 4-5 minutes in a stand mixer with a dough hook attachment.
- Watch the Dough, Not the Clock: While recipes often specify rising times, dough should be allowed to rise until it has doubled in size, regardless of the time it takes. Factors such as room temperature and humidity can affect rising times.
- Create a Warm Environment for Rising: To help the dough rise, place it in a warm, draft-free environment. You can preheat your oven to the lowest setting, then turn it off and place the dough inside with the door closed. Alternatively, you can place the dough in a lightly greased bowl covered with plastic wrap and a kitchen towel in a warm spot in your kitchen.
- Avoid Over-Flouring: While working with the dough, use only as much flour as necessary to prevent sticking. Too much flour can make the bread dense and dry.
- Shape the Loaves Carefully: Take your time shaping the dough into loaves to ensure even rising and a uniform appearance. Proper shaping also helps create a better crumb structure in the finished bread.
- Preheat Your Oven: Make sure your oven is fully preheated before baking the bread. A hot oven ensures that the bread rises properly and develops a nice crust.
- Cool the Bread Properly: Allow the freshly baked bread to cool completely on a wire rack before slicing. Cutting into the bread too soon can result in a gummy texture.

FAQs about Amish White Bread
Amish White Bread
Step into my kitchen and join me in the timeless tradition of baking with our beloved Amish White Bread recipe. With its soft texture, delicate crumb, and irresistible aroma, this bread embodies the heartwarming essence of homemade goodness. As I guide you through the simple steps of mixing, kneading, and baking, you’ll experience the joy of creating something truly special from scratch.
Ingredients
- 7 cups of all-purpose flour
- 1/3 cup of olive oil
- 2 cups of water
- 1/2 cup of sugar
- 1 tablespoon of salt
- 2 tablespoons of yeast
- 1 cup of hot water (about 110 degrees Fahrenheit)
- 1/2 teaspoon of sugar
Instructions
- In a small bowl, combine 1 cup of hot water, yeast, and 1/2 teaspoon of sugar. Set aside until the mixture becomes foamy.
- In a large bowl, mix together flour, remaining sugar, olive oil, water, and salt.
- Pour half of the flour mixture into a mixer bowl, using a stand mixer with a dough hook attachment.
- Add the foamy yeast mixture to the mixer bowl and begin mixing. Gradually add the remaining flour mixture while continuing to mix, until a large ball of dough forms. Mix for about 4-5 minutes.
- Place the dough in a large greased bowl and cover it with plastic wrap and a kitchen towel.
- Allow the dough to rise for about 1 hour or until it has doubled in size.
- Once the dough has risen, punch it down and divide it into two equal portions.
- Shape each portion of dough into a loaf, following the shape shown in the photo above.
- Place the shaped dough into buttered bread pans.
- Cover the pans with a kitchen towel and let the dough rise again for about 30 minutes.
- Preheat the oven to 350°F (175°C).
- Bake the loaves in the preheated oven for about 30 minutes or until the top is golden brown.
Recommended Products
As an Amazon Associate and member of other affiliate programs, I earn from qualifying purchases.


5 Comments