
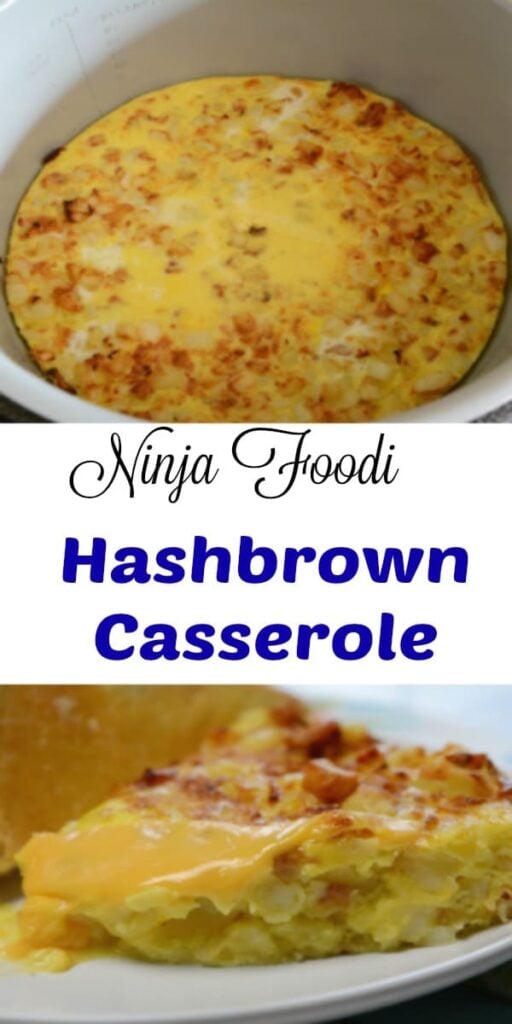
Ninja Foodi Hashbrown Casserole is an easy breakfast made with crispy hash browns, eggs, ham, and melted cheddar cheese. Everything cooks in the Ninja Foodi for a hearty breakfast or brunch with easy cleanup.
I made this casserole when I first started experimenting with my Ninja Foodi, and it quickly became a family favorite. It’s a simple way to put together a filling breakfast without using several pans.

About the Ingredients ⭐
- Eggs: Six eggs hold the breakfast casserole together.
- Frozen Hash Browns: A 48-ounce bag makes the potato base.
- Milk: Helps create the egg mixture.
- Onion: Adds flavor to the hash browns.
- Olive Oil: Used to sauté the onion and potatoes.
- Ham: Use ½ pound of diced ham.
- Cheddar Cheese: Adds a cheesy finish.
Be sure to check out the full recipe and ingredient list below
How to Make Ninja Foodi Hashbrown Casserole
Sauté the Onion: Set the Ninja Foodi to Sauté. Add the olive oil and chopped onion. Cook until softened and translucent.
Crisp the Hash Browns: Add the frozen hash browns. Close the Air Crisp lid and cook at 350°F for 15 minutes, stirring halfway through.
Prepare the Eggs: Whisk together the eggs and milk in a bowl.
Add the Filling: Stir the diced ham into the hash browns. Pour the egg mixture evenly over the top.
Cook the Casserole: Close the Air Crisp lid and cook at 350°F for approximately 10 minutes, or until the eggs are fully set.
Add the Cheese: Sprinkle cheddar cheese over the casserole. Close the lid for about 1 minute, until the cheese melts.
Tips I Found Helpful 🩵
- Stir the hash browns halfway through cooking for even browning.
- Dice the ham into small pieces so it spreads evenly throughout the casserole.
- Make sure the eggs are fully set in the center before serving.
How to Store Leftovers 🩵
Store leftover Ninja Foodi Hashbrown Casserole in an airtight container in the refrigerator for up to 3–4 days.
Reheat individual portions in the microwave until heated through. You can also reheat in the oven at 350°F until warm.
More Ninja Foodi Recipes
Ninja Foodi hashbrown casserole
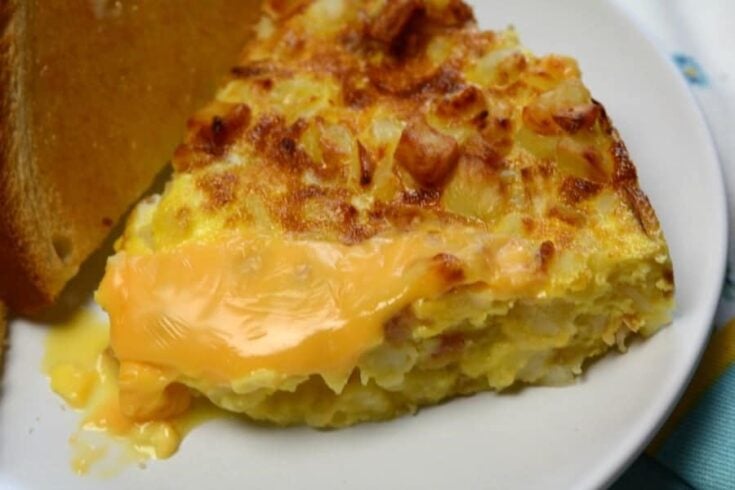
Ninja Foodi Hashbrown Casserole is an easy breakfast made with crispy hash browns, ham, eggs, and melted cheddar cheese.
Ingredients
- 6 eggs
- 48 ounces frozen hash browns
- ¼ cup milk
- 1 large onion, chopped
- 3 tablespoons olive oil
- ½ pound ham, diced
- ½ cup shredded cheddar cheese
Instructions
- Set the Ninja Foodi to Sauté. Add the olive oil and chopped onion. Cook until softened and translucent.
- Add the frozen hash browns. Close the Air Crisp lid and cook at 350°F for 15 minutes, stirring halfway through.
- Whisk together the eggs and milk in a bowl.
- Stir the diced ham into the hash browns. Pour the egg mixture evenly over the top.
- Close the Air Crisp lid and cook at 350°F for approximately 10 minutes, or until the eggs are fully set and the center reaches 160°F.
- Sprinkle the shredded cheddar cheese over the casserole. Close the lid for about 1 minute, until the cheese melts.
- Serve warm.
Notes
Use diced, fully cooked ham for this recipe. Stir the hash browns halfway through Air Crisp cooking for more even browning.
Cooking times may vary depending on your Ninja Foodi model. Make sure the eggs are fully cooked before serving.
Recommended Products
As an Amazon Associate and member of other affiliate programs, I earn from qualifying purchases.

Nutrition Information:
Yield:
6Serving Size:
1Amount Per Serving: Calories: 864Total Fat: 55gSaturated Fat: 11gUnsaturated Fat: 45gCholesterol: 221mgSodium: 1782mgCarbohydrates: 68gFiber: 6gSugar: 3gProtein: 23g

I enjoy your site and your recipes. But I would respectfully like to offer a suggestion. Many of your recipes are geared towards using an instapot or other cooking appliances. For those young cooks who may just be learning how to cook, and/or don’t have these appliances, suggest you include alternate cooking instructions with your recipes.
I will start doing that
When do you put the ham in?
Your recipe says it has bacon.
It is not part of the recipe, it says a pound of ham.
It also doesn’ state what to do with either within the recipe.
Did I miss sometging?
Um the part where is says add your breakfast meat maybe….. just an guess.
Hi! Recipe sounds absolutely wonderful and so easy. Thank you for posting it. One question, when do you add the ham? I’m not seeing it mentioned in the directions. Thanks so much! Lynda
Where do u put ham???
What is the temperature for the air crisp?
You specify bacon in the description, yet ham in the recipe. What temp for the air crisping? When do you put in the ham or bacon?
Do you add the meat raw or pre-cooked?
Our first one-pot meal in the new Foodi.
We used bacon which we sauteed with the onion. We also used re-constituted freeze-dried hash brown rather than frozen. We were uncertain about the crisp time but it turned out that 15 minutes was fine. Since they were mixed with the sauteed onion & bacon, they did not get too brown. The result was a nicely browned egg and potato “pancake”. Quite tasty and easy clean-up.
I was just given a foodi for a gift, I can’t wait to see how much I can cook!
Thanks for posting this recipe. I find that most recipes for cooking appliances are geared for air fryers or pressure cookers, not the foodi particularly, so this was helpful. I used half egg substitute and half real egg, and turkey bacon strips on top. The eggs were fine, the bacon wasn’t exactly crisp but turkey bacon usually isn’t. I would do what someone else suggested if I was doing it again and saute the bacon with the onion then add the potato. Also, there’s no spices in this, and it needed salt and pepper. Was a little bland. Overall good though.
Great recipe, I didn’t have hash browns so I crumbled tater tots for base. My family loved it. Definitely on the menu again. We recently got a foodi and have been looking for recipes and this one is quick, easy, and delicious. Loved that it was faster than doing my regular casseroles in the oven and heated the house up less. Thanks for sharing, look forward to seeing more.
Made this recipe and it was awesome. I used my own potatoes and shredded them. So good. Thanks for the recipe.
Can this be doubled ? Does it change cooking times if you do?
need more recipes
Excited to receive recipes